Bootstrap version 5 offers new features and updates that make your Power Pages sites more responsive and easier to customize.
- You can migrate any of your Bootstrap version 3 sites to version 5 regardless of the template that was used to create them.
- When you migrate existing Bootstrap version 3 sites to version 5, you can use either the standard data model or the enhanced data model.
- Consider testing the migration with a developer site.
- To check the current version of Bootstrap, see the bootstrap.min.css web file for your website.
Steps to follow for migration
- Download the website folder.
- Run the migration tool on the folder.
- Review your changes.
- Upload the migrated website record.
- Clear the server-side cache.
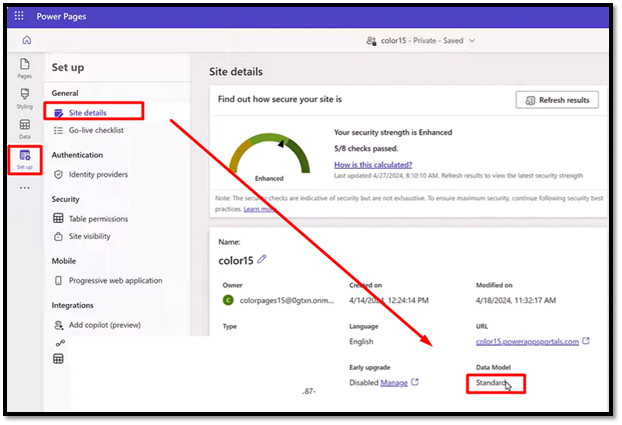
Site version details
User can check site version details by clicking three dots (select details)
Admin Setting
Navigate to admin setting by clicking on admin under settings.
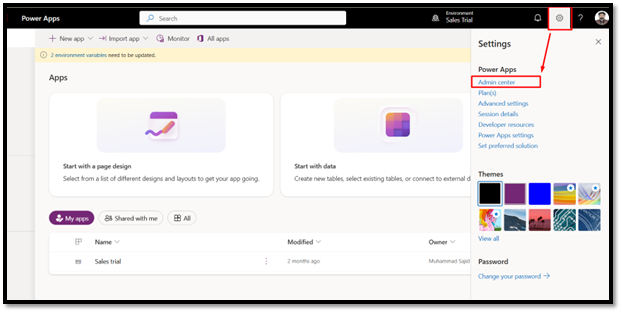
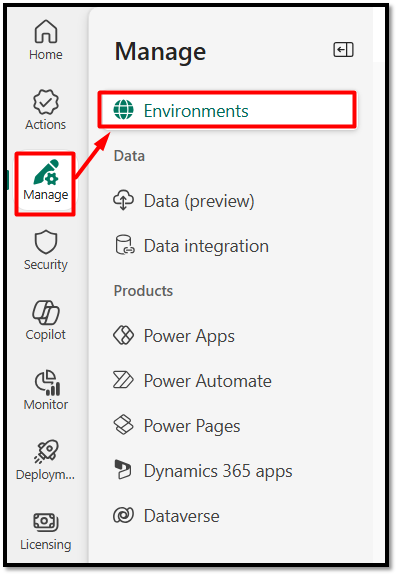
Environment Navigation
Navigation to environment section by clicking on Action and then Environment
Backup environment
Create backup for your selected environment before proceeding, as mention in given screenshot. To get backup select your target environment > click on ‘Backup & Restore’ then click on ‘Create manual backup’ button available under Backup & Restore button.
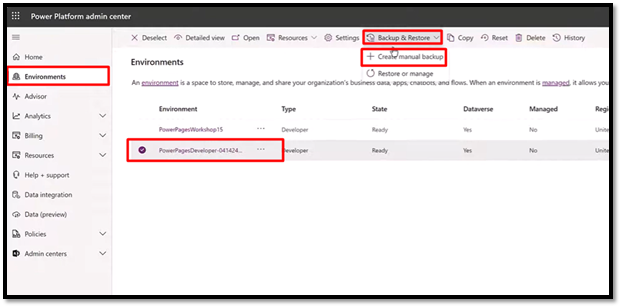
When user click on Create manual backup system will open a new quick create form where user will enter value able name of the environment and click on ‘create button available in bottom of this form

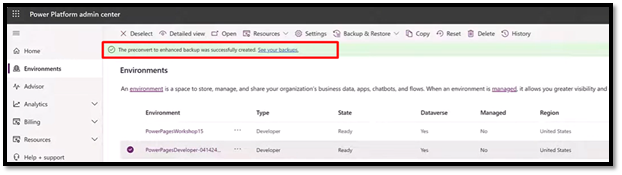
When the backup is read you will see a popup
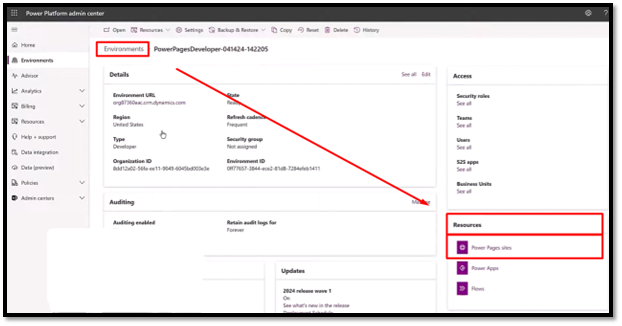
Resource
Navigate to resources section and select ‘Power Pages Sites’ to the selected environment by clicking on it.
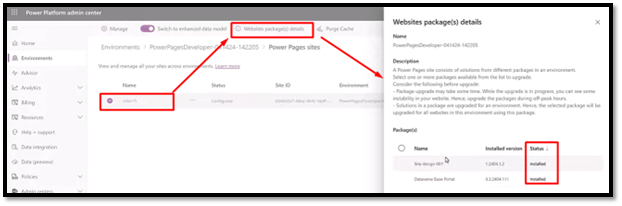
When user open power page sites, system will open power pages setup page where user can sites data.

Lates updates installation
Make sure latest updates are installed. User can select power pages site and hit on ‘Websites packages(s) details where user can further info. User should make sure everything is updated to date.
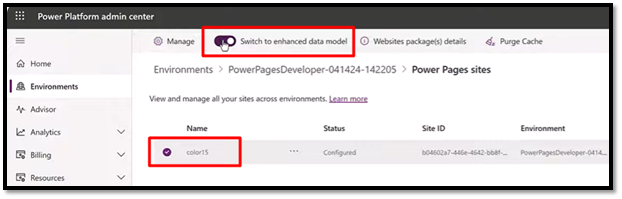
Switch to enhanced data model
Make sure this button is turned on
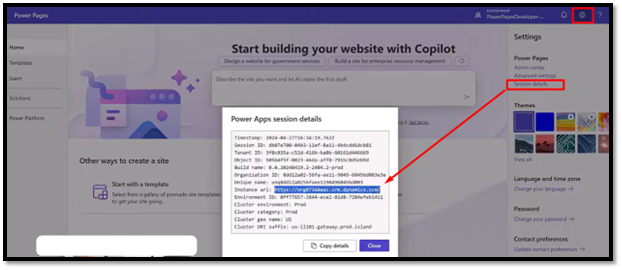
Instance URL
Now user need instance url. User can get select instance url by clicking on ‘Settings’ and select ‘Session Details’ and get url as mention in given screenshot
Pac Cli
Open visual studio installed in your system, if you don’t have visual Studio Code go to this link to download VS code and installed it in your system
https://code.visualstudio.com/download
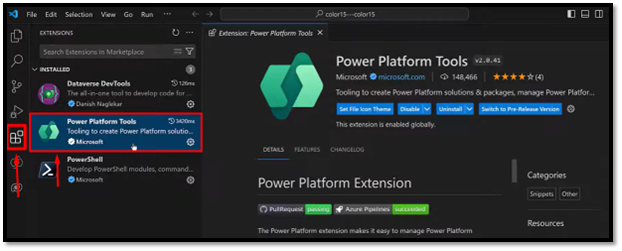
Power Platform Tool
After installing visual studio code go to extension and install Power Platform tool extension
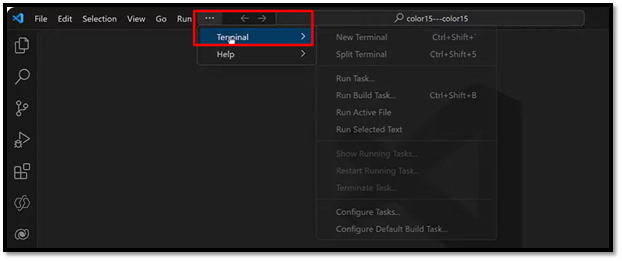
Open terminal
After installing power platform tool extension. Open terminal. Click on 3 dots and click terminal and new terminal
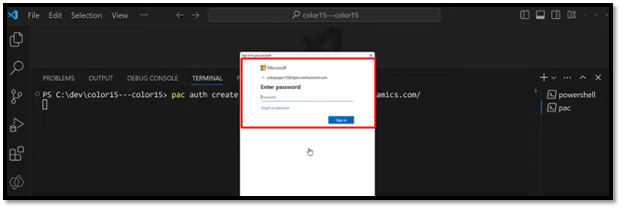
Authenticate to Dataverse Organization
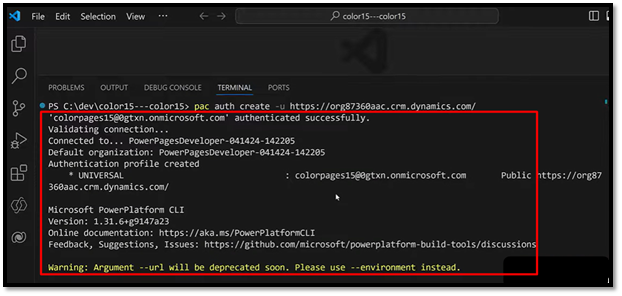
Enter the following command to authenticate to the Dataverse organization for your Power Platform environment
pac auth create -u [Dataverse URL > instance url that we copy from session details]
example:
pac auth create -u https://org.crm.dynamics.com
when user click ‘enter’ system will prompt for credentials
Once user enter credentials user will get this response
Verify authentication
pac auth list
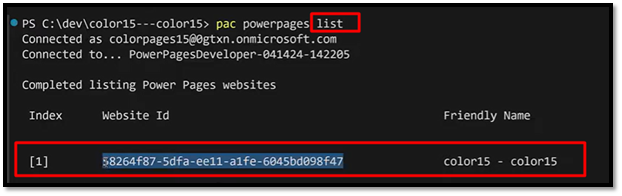
List Power Pages websites
pac powerpages list
Download website (Bootstrap v3)
pac powerpages download –path “C:\PowerPages\v3site” -id <Website-GUID>
Run Bootstrap v3 to v5 migration
pac powerpages bootstrap-migrate -p “C:\PowerPages\v3site”
Upload migrated site to sandbox
pac powerpages upload –path “C:\PowerPages\v3site_v5”
Review your changes