- Introduction
In modern business applications, user experience is just as important as functionality. With Microsoft Dynamics 365, organizations are empowered to tailor their CRM interface and workflows to match internal processes and user needs. One of the more powerful features supporting this flexibility is Canvas Dialogs—configurable, interactive panels that can be embedded into user workflows.
Canvas Dialogs allow for the presentation of custom forms, data inputs, and actions in a streamlined, embedded format within the Dynamics 365 interface. Unlike traditional dialogs, these are more flexible, modern in design, and can be fully customized to display only what’s needed—when it’s needed.
Enter Modern Dialogs, a tailored implementation that leverages the capabilities of Canvas Dialogs while enabling dynamic integration with form ribbons. These dialogs aren’t just static UI forms—they can dynamically receive parameters, link to records, adapt based on context, and even respond to JavaScript logic for advanced control.
In this blog post, we’ll walk through the end-to-end process of setting up Modern Dialogs, including:
- How dialogs are structured and stored using custom tables like aqc_canvasdialog
- How to configure metadata and parameters to ensure flexibility
- How to use JavaScript to dynamically display and run dialogs from the ribbon
Whether you’re building service request workflows or custom input forms for business processes, this post will give you a practical, developer-friendly guide to building and launching Modern Dialogs in your Dynamics 365 environment.
- Understanding the Data Structure
Before diving into configuration and UI customization, it’s important to understand how the data behind Canvas Dialogs is structured. Dynamics 365 provides a highly relational model, and in this implementation, a few custom tables define the core of how dialogs are organized and executed.
- Key Tables and Relationships
- aqc_canvasdialog
This is the primary table that stores individual dialog definitions. Each record in this table represents a unique Canvas Dialog that can be invoked from the UI.
Key Fields:
- aqc_canvasdialogid (Primary Key)
- aqc_categoryid (Lookup to aqc_dialogcategory)
- aqc_name – Dialog title
- aqc_entitylogicalname – Tied to the entity (e.g., account, contact)
- aqc_imageresourcename – Optional icon resource
- aqc_designtype, aqc_height, aqc_width, aqc_position – Used to control dialog appearance
- aqc_dialogcategory
Used to categorize dialogs. These categories are displayed as grouped flyouts in the ribbon UI, helping users find related dialogs quickly.
Key Field:
- aqc_dialogcategoryid (Primary Key)
This table is related to aqc_canvasdialog via the aqc_categoryid lookup.
- aqc_dialogconfigurationparameter
This table stores the configuration parameters associated with each dialog. Parameters can be passed dynamically to dialogs when they are launched, enabling contextual behavior.
Key Fields:
- aqc_dialogconfigurationparameterid (Primary Key)
- aqc_canvasdialogid (Lookup to aqc_canvasdialog)
- aqc_name – Parameter name
- aqc_value – Default or dynamic value
- Entity Relationship Overview
To clarify the relationships, here’s a simplified structure:
ruby
- A category can have many dialogs.
- A dialog can have many configuration parameters.
- These parameters help personalize and drive dynamic behaviors when the dialog is opened.
This relational setup allows for high modularity. Admins or developers can add, remove, or reassign dialogs and parameters without modifying the core logic—keeping everything flexible and maintainable.
- The Modern Dialog Configuration UI
Once the data structure is in place, the next step is to configure the actual dialogs in Dynamics 365. This is done through a custom UI typically accessed via a solution component—often labeled “Modern Dialogs” or something similar, depending on your organization’s naming conventions.
- Where to Access
The configuration UI for Modern Dialogs is generally accessible from within the app’s sitemap or a specific configuration area. Navigating to this interface brings you to a list of all existing Canvas Dialog definitions.
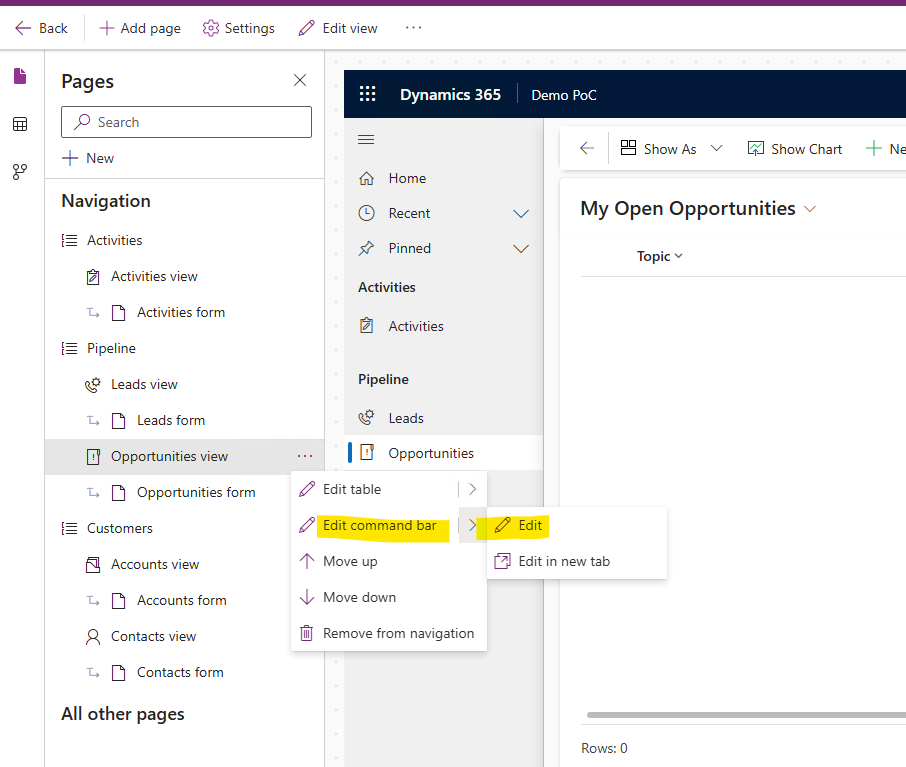
Each record in this interface represents one dialog configuration that can later be executed through the form ribbon or other automation.
- Dialog Metadata Fields
When creating or editing a dialog, several important fields define how the dialog will behave and display:
| Field | Purpose |
| aqc_name | Display name of the dialog. Appears in the ribbon flyout. |
| aqc_entitylogicalname | Links the dialog to a specific entity (e.g., account, contact). |
| aqc_designtype | Determines size units (true = pixels, false = percent). |
| aqc_width / aqc_height | Sets the dialog dimensions (applies based on designtype). |
| aqc_position | Positioning of the dialog (e.g., Center, Side). |
| aqc_imageresourcename | (Optional) Web resource name for the dialog icon shown in the ribbon. |
| aqc_categoryid | Lookup to aqc_dialogcategory, used to group dialogs in the UI. |
These fields provide full control over the dialog’s appearance and contextual relevance within the application.
- Parameter Configuration
After setting up the dialog, you can define parameters using the aqc_dialogconfigurationparameter table. These are especially useful when you want to pass values from the current record to the dialog form.
Example Parameters:
| Name | Value/Usage |
| accountid | Passes the ID of the current account |
| aqc_servicerequesttype | Could define dialog behavior or UI mode |
These parameters are read by the HTML page loaded in the dialog (in this case, RunCanvasApp.html) and can be used to pre-fill fields or trigger logic inside the Canvas App or custom form.
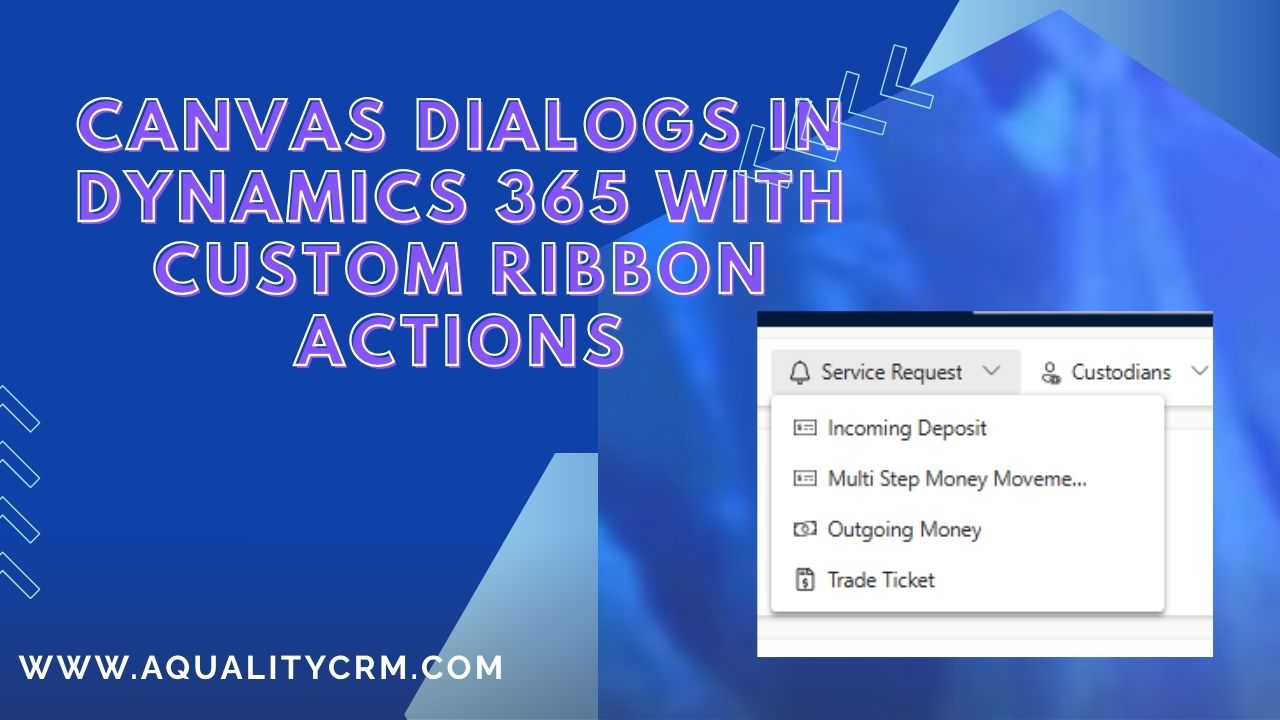
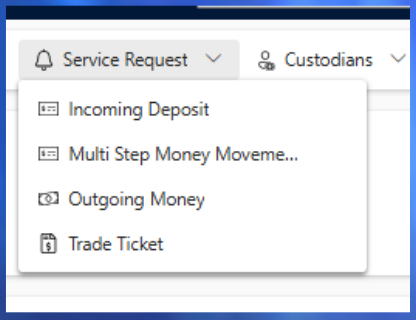
- Visual Example
Dialogs configured with:
- Entity: Account
- Category: Service Request
- Parameter: accountid
Will automatically appear under the “Service Request” flyout on the Account form’s ribbon. This allows users to initiate different dialog workflows based on the current context—without navigating away from the record form.
- Ribbon Integration: Making Dialogs Accessible
After configuring your Canvas Dialogs, the final piece of the puzzle is making them available to users—ideally right where they work most: the form ribbon. This section explains how dialogs are dynamically added as flyout buttons, how visibility is controlled, and how users can trigger dialogs with a single click.
- Dropdown Integration in the Form
In the Dynamics 365 form ribbon (e.g., on the Account entity form), users will see a dropdown—typically labeled something like “Service Request”. This dropdown is dynamically populated with the Canvas Dialogs you’ve configured for that entity.
Each button in the dropdown corresponds to a dialog that:
- Is active (statecode = 0)
- Matches the entity (aqc_entitylogicalname = “account”)
- Belongs to the current user’s security context
- Optionally, is grouped by category (from aqc_dialogcategory)
When clicked, the dialog is opened in a modal form using parameters and styling defined in the configuration.
- JavaScript Entry Point
The functionality is wired using a custom JavaScript file:
ApplicationRibbonCustomizations.js, specifically the function:
AQualityCRMRibbon.onRunCanvasAppClick(props, context)
This function is called when a user clicks a dialog button. Here’s what it does:
- Saves the form (context.data.save()).
- Fetches dialog config (design type, width, height, position).
- Prepares navigation parameters.
- Launches the dialog via Xrm.Navigation.navigateTo(…).
The dialog is rendered as a web resource page, typically named:
aqc_/html/RunCanvasApp.html
This page receives JSON data, including the dialog ID and the record context, allowing it to behave dynamically.
- Example Command Checker Metadata
The ribbon button uses the following metadata configuration:
- FunctionName: AQualityCRMRibbon.onRunCanvasAppClick
- Library: $webresource:aqc_/Scripts/ApplicationRibbonCustomizations.js
- CrmParameter: PrimaryControl and CommandProperties
- EnableRule: tam.ApplicationRibbon.ServiceRequest.EnableRule
- DisplayRule: Mscrm.OutlookRenderTypeWeb
These configurations are typically set in the Ribbon Workbench or via solution XML.
- Why This Matters
This approach has several benefits:
- Dynamic Behavior: Dialogs are tied to metadata, not hardcoded logic.
- Reusable UI: The same JavaScript and web resource can serve multiple dialogs.
- User-Friendly: Grouped buttons and icons improve usability and clarity.
- Low Maintenance: Adding or updating dialogs doesn’t require redeployment—just data updates.
- Visibility and Population Logic
To provide a seamless and intelligent user experience, the ribbon integration doesn’t just statically show dialog buttons—it dynamically determines whether to show the flyout menu, and which dialogs to include, all based on the current entity and user context.
This dynamic behavior is controlled entirely through JavaScript, ensuring the UI stays clean, relevant, and adaptable.
- Dynamic Visibility
The function responsible for showing or hiding the Run Canvas App flyout is:
AQualityCRMRibbon.isRunCanvasAppVisible(context)
This function is linked to the ribbon’s Enable Rule. It performs the following steps:
- Retrieves the entity name from the current form.
- Calls getAppsConfigurations() to query the backend for active dialog records (statecode = 0) that match the entity.
- Sets a flag (configurationExist) to determine whether any dialogs are found.
- If dialogs exist, it refreshes the ribbon and returns true—allowing the button to appear.
This prevents users from seeing a ribbon option that has no available dialogs, keeping the UI clean and intuitive.
- Flyout Menu Generation
If dialogs are found for the current entity, the code generates an XML-based flyout menu using the following flow:
Key Function:
getAppsConfigurations(entityLogicalName, callback)
Steps Performed:
- Sends a REST API request to fetch dialog records for the current entity.
- For each dialog, retrieves:
- Dialog name
- Unique ID
- Optional image icon
- Category name (via formatted OData annotation)
- Groups dialogs by category using a helper groupBy() function.
- For each group:
- Builds a <FlyoutAnchor> element if categorized.
- Builds <Button> elements with labels, tooltips, and optional icons.
- Assembles the XML into a global variable menuXml.
- Updates the flyout’s XML via:
props.PopulationXML = menuXml;
This menu structure is what users ultimately see in the ribbon dropdown.
- Example: Grouped Menu Output
Dialogs with a aqc_categoryid appear under a grouped heading. Those without a category appear as ungrouped buttons. For example:
<MenuSection>
<Controls>
<FlyoutAnchor Id=”Service_Request”>
<Menu>
<Button LabelText=”Create Ticket” … />
<Button LabelText=”Escalate Case” … />
</Menu>
</FlyoutAnchor>
<Button LabelText=”General Feedback” … /> <!– No category –>
</Controls>
</MenuSection>
- Efficient UI Refresh
To avoid excessive API calls:
- The system caches the result in configurationExist.
- The ribbon only refreshes once per session unless a change is detected.
This ensures performance remains optimal, even with complex entities and multiple dialogs.
- Deep Dive: JavaScript Implementation
The power of this dialog system lies in its modular, metadata-driven JavaScript. The custom script—ApplicationRibbonCustomizations.js—handles everything from fetching dialog data to rendering flyout buttons and launching dialogs. Let’s break down the key components and how they work together.
- onRunCanvasAppClick: Launching the Dialog
AQualityCRMRibbon.onRunCanvasAppClick = function(props, context) {
// 1. Save current form
context.data.save().then(() => {
// 2. Retrieve dialog settings
Xrm.WebApi.online.retrieveRecord(“aqc_canvasdialog”, props.SourceControlId, “ ? $select = aqc_designtype, aqc_height, aqc_position, aqc_width”)
.then(result => {
// 3. Set dialog title dynamically
const titleContainer = parent.document.getElementById(“defaultDialogChromeTitle”);
if (titleContainer) {
titleContainer.innerHTML = result.aqc_name;
}
// 4. Build dialog parameters
const data = {
entityname: context.data.entity.getEntityName(),
entityid: context.data.entity.getId().replace(“{
“,
“”).replace(“
}”, “”),
dialogid: props.SourceControlId
};
// 5. Configure dialog dimensions and position
const dialogParameters = {
pageType: “webresource”,
webresourceName: “aqc_ / html / RunCanvasApp.html”,
data: JSON.stringify(data)
};
const navigationOptions = {
target: AQualityCRM.Crm.Common.Constants.navigateOptionsTarget.Dialog,
width: {
unit: result.aqc_designtype ? “px” : “ % ”,
value: result.aqc_width ?? 50
},
height: {
unit: result.aqc_designtype ? “px” : “ % ”,
value: result.aqc_height ?? 61
},
position: result.aqc_position ?? AQualityCRM.Crm.Common.Constants.navigateOptionsPosition.Center
};
// 6. Open dialog
Xrm.Navigation.navigateTo(dialogParameters, navigationOptions).catch(Xrm.Navigation.openErrorDialog);
})
.catch(Xrm.Navigation.openErrorDialog);
});
};
Summary: This function ensures the form is saved, then opens a web resource in a modal dialog using values from the selected Canvas Dialog record.
- isRunCanvasAppVisible: Control Ribbon Button Visibility
AQualityCRMRibbon.isRunCanvasAppVisible = function (context) {
const entityLogicalName = context.data.entity.getEntityName();
if (configurationExist === null) {
getAppsConfigurations(entityLogicalName, (dialogs) => {
configurationExist = dialogs.length > 0;
if (configurationExist) {
context.ui.refreshRibbon();
}
});
}
return configurationExist === true;
};
Purpose: Ensures that the ribbon flyout only appears if dialogs exist for the current entity.
- getAppsConfigurations: Fetching Available Dialogs
function getAppsConfigurations(entityLogicalName, callBack) {
const requestDialogs = new XMLHttpRequest();
requestDialogs.open(“GET”, Xrm.Utility.getGlobalContext().getClientUrl() + “/api/data/v9.0/aqc_canvasdialogs?$select=aqc_imageresourcename,aqc_entitylogicalname,aqc_name,aqc_canvasdialogid,_aqc_categoryid_value&$filter=aqc_entitylogicalname eq ‘” + entityLogicalName + “‘ and statecode eq 0&$orderby=aqc_name asc”, true);
requestDialogs.setRequestHeader(“Accept”, “application/json”);
requestDialogs.setRequestHeader(“Content-Type”, “application/json; charset=utf-8”);
requestDialogs.onreadystatechange = function () {
if (this.readyState === 4 && this.status === 200) {
const results = JSON.parse(this.responseText).value;
const dialogs = results.map(r => ({
entityLogicalName: r.aqc_entitylogicalname,
name: r.aqc_name,
id: r.aqc_canvasdialogid,
image: r.aqc_imageresourcename,
category: r[“[email protected]”]
}));
callBack(dialogs);
}
};
requestDialogs.send();
}
Purpose: Retrieves and formats the dialog data needed to build the menu.
- onRunCanvasAppPopulateFlyout: Setting the Menu XML
AQualityCRMRibbon.onRunCanvasAppPopulateFlyout = function (props) {
props.PopulationXML = menuXml;
};
This function applies the previously generated XML (menuXml) to populate the ribbon flyout.
- XML Menu Construction and Grouping
Dialogs are grouped and sorted using this helper:
function groupBy(xs, key) {
return xs.reduce((rv, x) => {
(rv[x[key]] = rv[x[key]] || []).push(x);
return rv;
}, {});
}
Each group is used to create a <FlyoutAnchor> with <Button> controls dynamically inserted into the ribbon.
Summary of Flow
- Ribbon loads → Checks visibility via isRunCanvasAppVisible().
- If visible, getAppsConfigurations() pulls dialog list.
- Dialogs grouped and rendered into XML.
- When user clicks dropdown, onRunCanvasAppPopulateFlyout() sets the flyout buttons.
- When a button is clicked, onRunCanvasAppClick() launches the dialog.
- Best Practices and Tips
Implementing Modern Canvas Dialogs in Dynamics 365 can add tremendous value—when done right. Here are some best practices and practical tips to ensure your dialog system is robust, scalable, and user-friendly.
✅ 1. Use Categories to Organize Dialogs
- Group dialogs using the aqc_dialogcategory table.
- Helps users quickly find the right dialog in the ribbon dropdown.
- Categories become FlyoutAnchors, which are cleaner and more intuitive than a long list of flat buttons.
Tip: Use meaningful category names like “Service Requests”, “Feedback”, or “Internal Tools”.
✅ 2. Keep Dialog Dimensions Consistent
- Be deliberate with aqc_width, aqc_height, and aqc_designtype:
- Use % for responsive design.
- Use px for fixed layout dialogs (like embedded forms or tightly controlled UI).
Recommended defaults:
- Width: 50%
- Height: 61%
- Position: Center (unless you want a side panel)
✅ 3. Use Clear and Consistent Naming
- Name your dialogs (aqc_name) clearly—this name appears in the ribbon.
- Avoid special characters or cryptic codes unless standardized.
- Use Pascal Case or Title Case (e.g., “Create New Request”, not “createnewrequest”).
✅ 4. Always Pass Contextual Parameters
- Use aqc_dialogconfigurationparameter to send useful data like record IDs, types, or flags.
- Avoid hardcoding anything in your HTML/web resource—rely on dynamic inputs.
Example parameters:
| Parameter Name | Purpose |
| accountid | Passes current account ID |
| ownerid | Passes user or team for assignment |
| mode | Tells dialog to open in edit/view |
✅ 5. Validate Web Resource References
- Ensure image and script web resources are published and named correctly.
- Missing icons or JS files will cause silent UI failures.
- Use fallback images like aqc_/Images/Icons/Button/ServiceRequest.svg if needed.
✅ 6. Refresh the Ribbon After Adding Dialogs
- The JavaScript automatically refreshes the ribbon (context.ui.refreshRibbon()), but this only works after the configurationExist flag is updated.
- If your dialog doesn’t show up right away:
- Check that the entity name (aqc_entitylogicalname) matches exactly.
- Check that statecode = 0 (active).
- Manually reload the form or publish customizations.
✅ 7. Test with Multiple Entities
- Design dialogs to be reusable across entities if possible.
- For example, a “Feedback” dialog could be attached to Accounts, Contacts, and Cases with minor config differences.
✅ 8. Keep the JavaScript Modular and Clean
- Avoid embedding business logic inside the ribbon script.
- Instead, push logic into the dialog web resource or Canvas App itself.
- This keeps the ribbon script lightweight and easy to maintain.
Conclusion
Canvas Dialogs—when combined with custom ribbon integration—offer a powerful way to streamline user interactions in Microsoft Dynamics 365. By structuring dialogs around metadata, categories, and configuration parameters, you can create a dynamic, low-code interface that enhances productivity and supports consistent business processes.
Through this post, we’ve explored:
- How dialogs are modeled using custom tables like aqc_canvasdialog and aqc_dialogcategory
- How dialog metadata drives everything from layout to grouping
- How JavaScript functions dynamically populate and control the ribbon UI
- How to launch dialogs with precise control using parameters and runtime logic
What makes this approach stand out is its maintainability—adding or updating dialogs requires no code changes, just data updates. It also ensures user-friendliness with contextual dropdowns, dynamic visibility, and consistent styling.
Whether you’re building a service request interface, launching internal workflows, or guiding user actions through custom UIs, this pattern provides a solid, extensible foundation. Embrace it as a way to make your Dynamics 365 environment smarter, faster, and more aligned with your organization’s needs.